How to configure SSO with Keycloak
This feature requires HTTPS to work.
This documentation includes examples from a demo environment for informational purposes only. Adapt the configuration values (domains, ports, credentials) to match your specific setup.
Passbolt Pro Edition supports SSO via OpenID Connect (OIDC). This guide shows how to configure SSO with Keycloak as an example.
How does it work?
Passbolt SSO uses Keycloak OAuth2/OpenID Connect alongside the existing challenge-based authentication. When a user logs in through Keycloak, they unlock a server-side key needed to decrypt their secret key passphrase.
For detailed information about supported user flows and risk analysis, see the developer documentation.
Prerequisites
You need the following to configure Keycloak SSO with Passbolt:
- A running Keycloak instance (version 26.4 or later)
- Administrative access to both Keycloak and Passbolt
- HTTPS enabled on both Keycloak and Passbolt instances
- Trusted SSL certificates between Passbolt and Keycloak servers
This guide uses Keycloak 26.4. Use a specific version rather than latest for consistency: quay.io/keycloak/keycloak:26.4.
Configuration
Email addresses must match exactly between the SSO provider and Passbolt. Users can only sign in with SSO if their email address exists in both systems.
Step 1: Configure Keycloak
Create a Keycloak Realm
- Navigate to your Keycloak instance (e.g.,
https://keycloak.local:8443) - Log in with the admin credentials:
- Username:
admin - Password:
admin
- Username:
- Navigate to the dropdown in the top-left corner and click "Create realm"
- Enter a realm name (e.g., "passbolt")
- Click "Create"
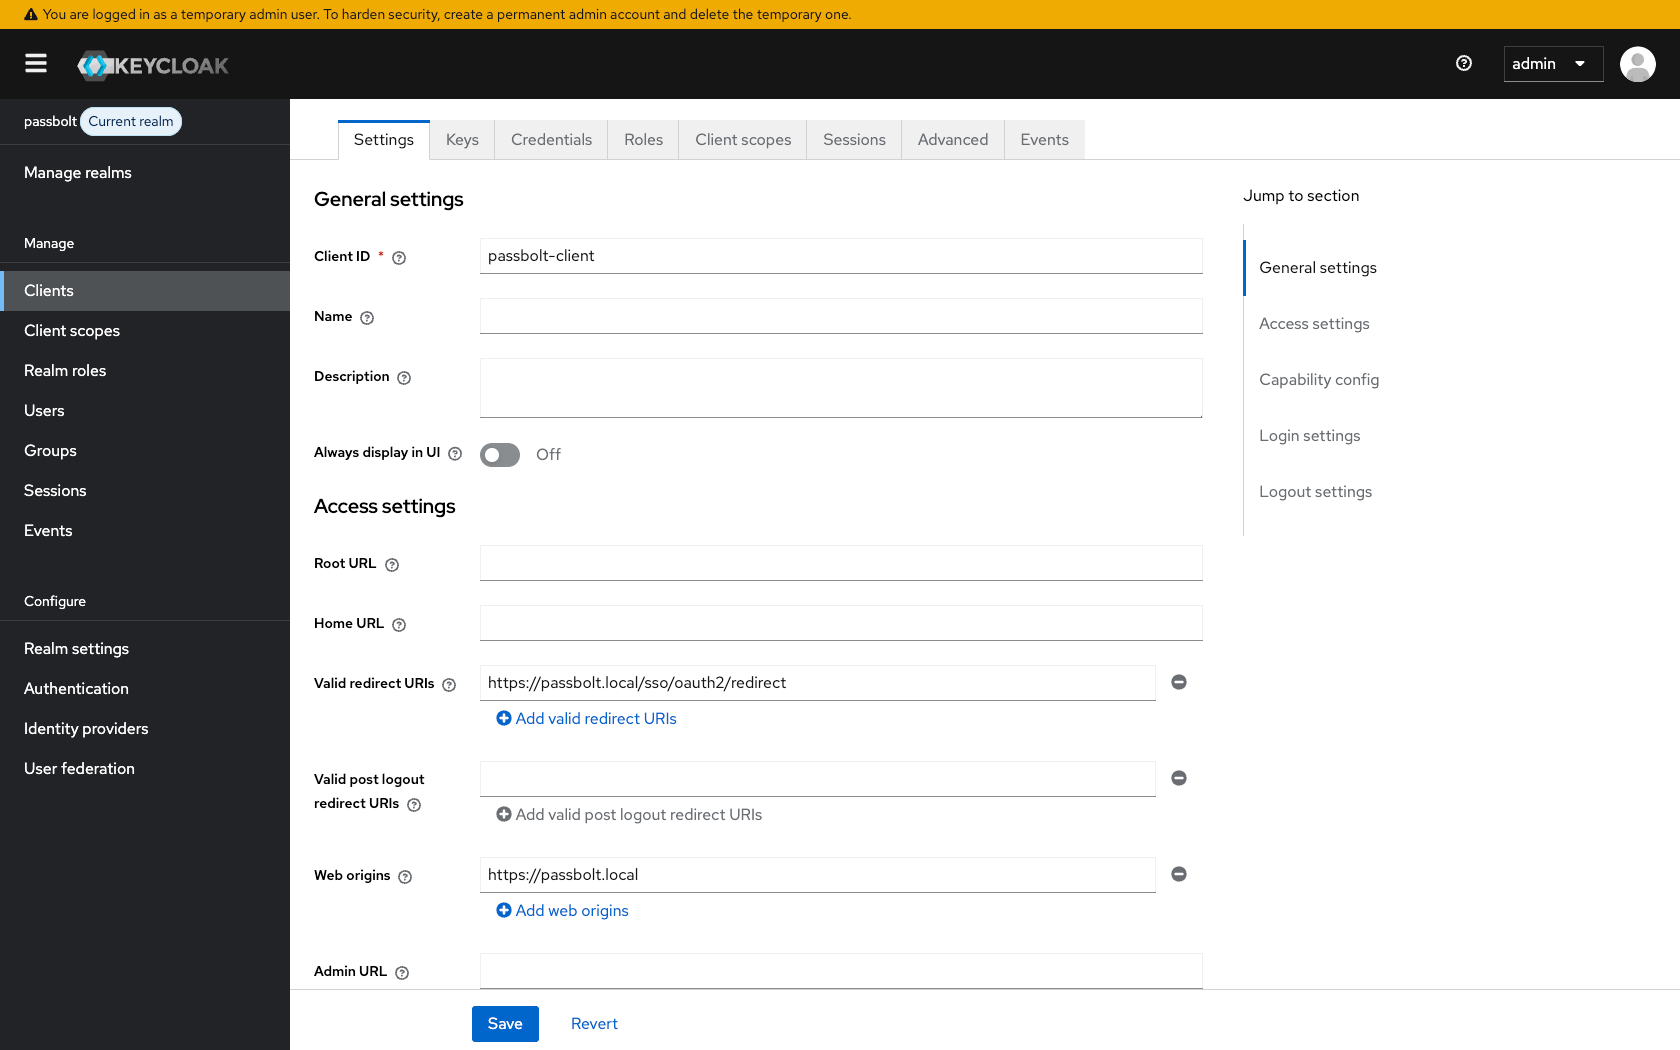
Create a Keycloak Client
-
In your newly created realm, go to "Clients" in the left menu
-
Click "Create client"
-
Configure the client:
- Client type: OpenID Connect
- Client ID:
passbolt-client(or your preferred name) - Click "Next"
-
Configure client settings:
- Client authentication: On
- Authorization: Off
- Authentication flow: Standard flow
- Click "Next"
-
Configure login settings:
- Root URL: Leave empty
- Home URL: Leave empty
- Valid redirect URIs: Add your Passbolt redirect URI (get this from Passbolt's SSO configuration page)
- Web origins:
https://passbolt.local - Click "Save"
Configure Client Credentials
- In the client settings, go to the "Credentials" tab
- Copy the Client secret value - you'll need this for Passbolt configuration
Create a Test User
-
Go to "Users" in the left menu
-
Click "Create new user"
-
Fill in the user details:
- Username: Choose a username
- Email: Use an email that exists in Passbolt
- First name and Last name: Fill as desired
- Email verified: Toggle to "On"
- Click "Create"
-
Set a password for the user:
- Go to the "Credentials" tab
- Click "Set password"
- Enter a password and confirm it
- Toggle "Temporary" to "Off"
- Click "Save"

Step 2: Configure Passbolt Server
Domain Name Resolution
If your Keycloak instance uses a custom domain that isn't registered in DNS, ensure your Passbolt server can resolve it:
- Edit
/etc/hostson your Passbolt server:
127.0.0.1 keycloak.local
Replace 127.0.0.1 with your actual Keycloak server's IP address and keycloak.local with your Keycloak domain.
- Test connectivity:
ping keycloak.local
SSL Certificate Configuration
If you're using self-signed certificates:
- Copy your root CA certificate to the Passbolt server
- Install the certificate (example for Debian/Ubuntu):
# Copy the certificate to the trusted certificates directory
sudo cp rootCA.crt /usr/share/ca-certificates/rootCA.crt

# Update the list of trusted certificates
sudo dpkg-reconfigure ca-certificates
- Run the reconfiguration and select your
rootCA.crtwhen prompted - Verify SSL connectivity:
curl -s -o /dev/null -v https://keycloak.local:8443
You should see output similar to:
* SSL certificate verify ok.
* Server certificate:
*  subject: CN=keycloak.local
*  subjectAltName: host "keycloak.local" matched cert's "keycloak.local"
*  issuer: CN=Your Root CA
* Connected to keycloak.local port 8443
< HTTP/2 302
< location: https://keycloak.local:8443/admin/
If you see certificate verification errors, fix the certificate trust configuration.
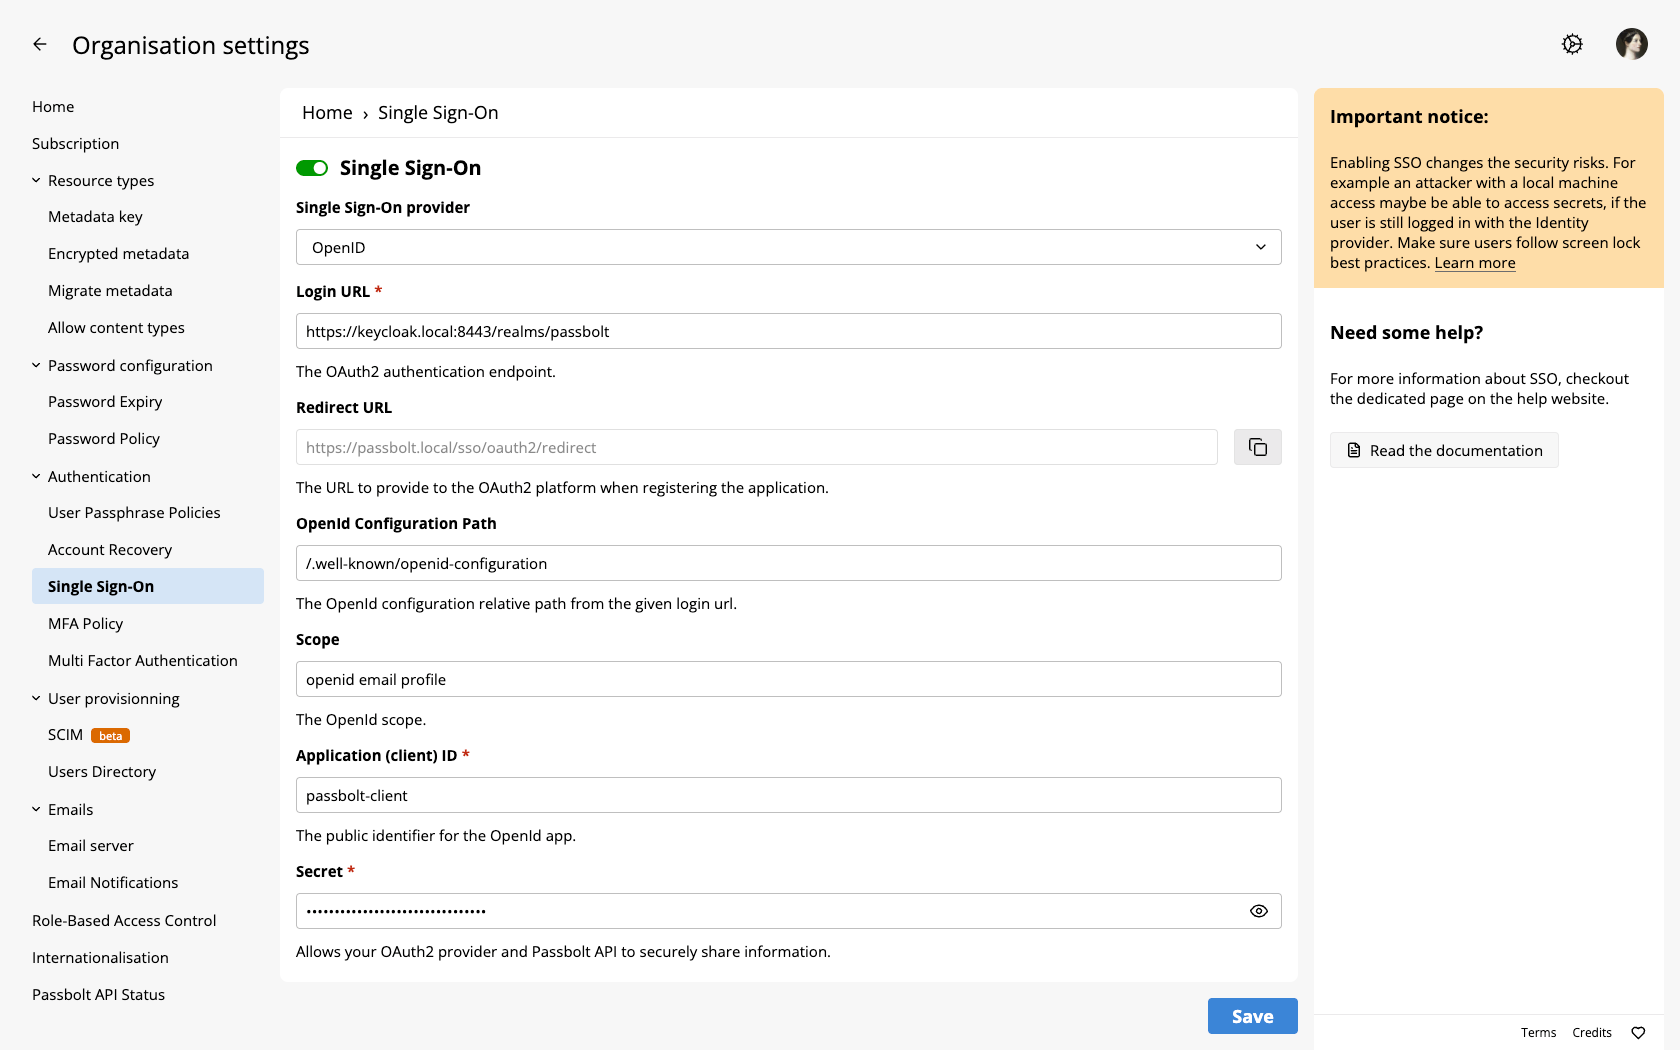
Step 3: Configure Passbolt Administration Settings
- Sign in to Passbolt with an administrator account
- Navigate to Administration > Single Sign-On
- Select "OpenID Connect" from the available providers
- Configure the OpenID Connect settings
- Copy the Redirect URL from Passbolt's SSO configuration page and add it to your Keycloak client's Valid redirect URIs setting
- Click "Save settings" to perform a test authentication
- Complete the authentication flow with your Keycloak credentials
- If successful, save the settings permanently
Configuration example (realm "passbolt", Keycloak at https://keycloak.local:8443):
- URL:
https://keycloak.local:8443/realms/passbolt - OpenID configuration path:
/.well-known/openid-configuration - Scope:
openid profile email - Client ID:
passbolt-client - Client secret:
[your client secret from Keycloak]
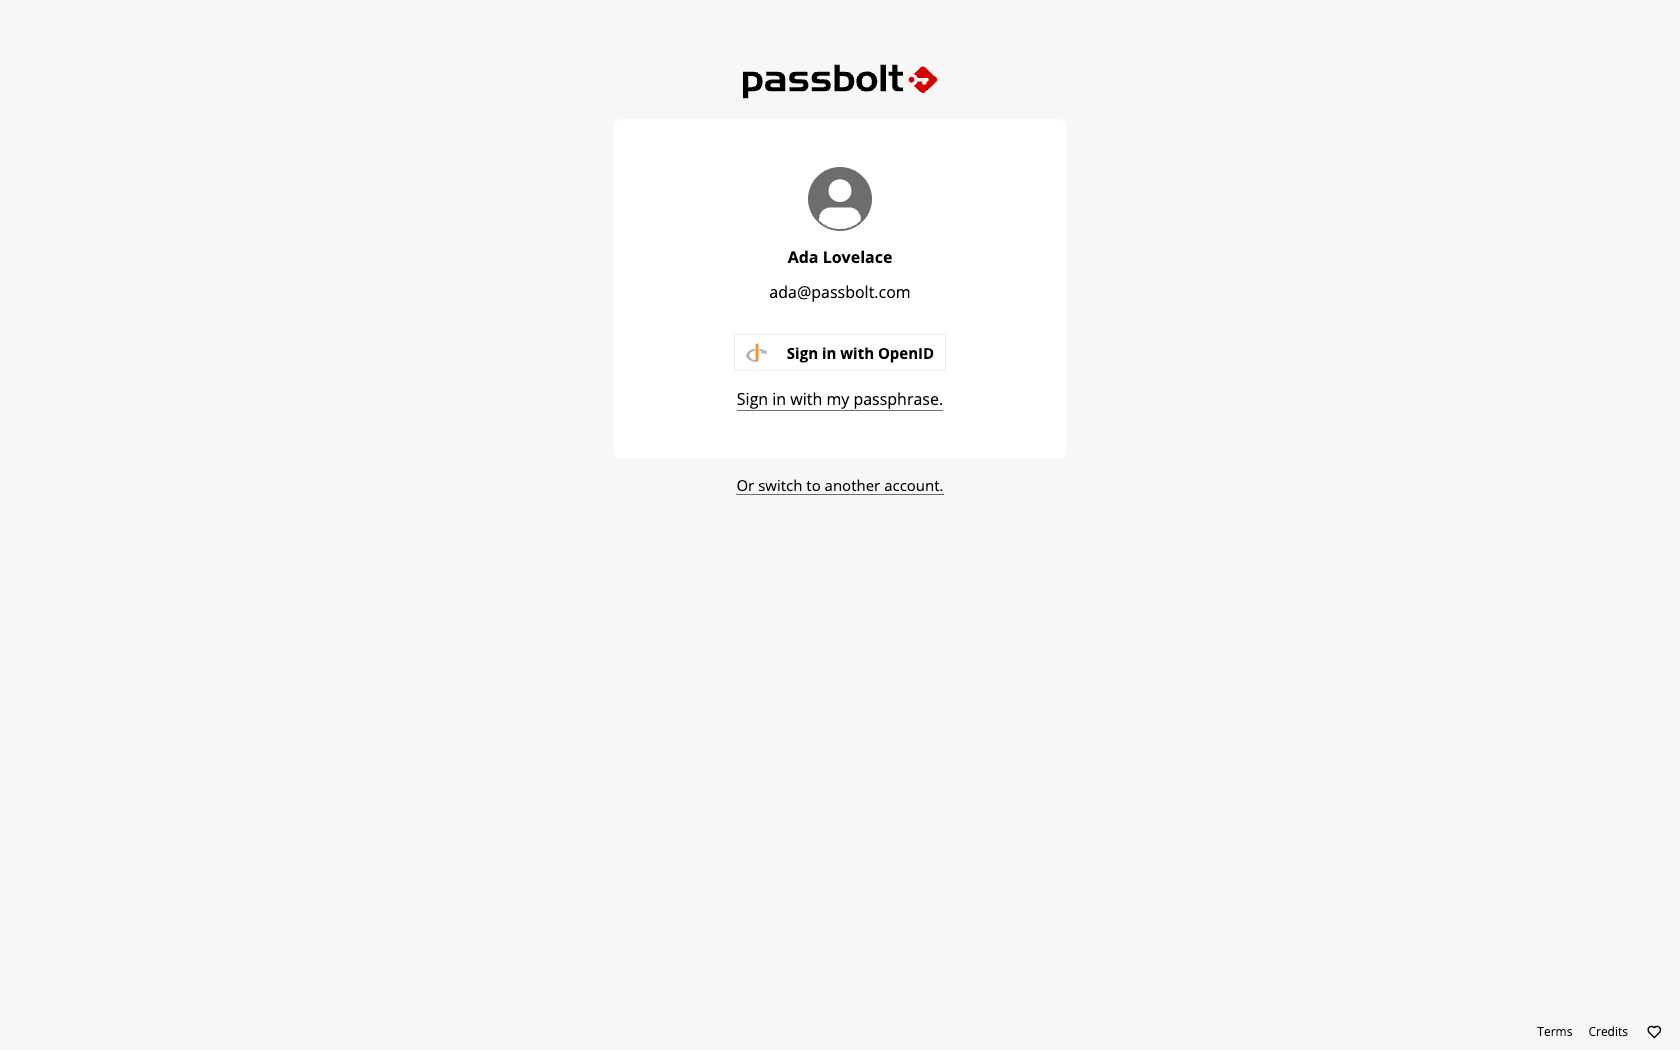
Step 4: Test the Configuration
- Sign out from Passbolt
- On the login page, you should see a "Sign in with OpenID" button
- Click the button and verify you can authenticate through Keycloak
- Ensure you can access Passbolt after successful authentication
Troubleshooting
Common Issues
Authentication Failures: If authentication fails:
- Verify the client ID and secret are correct
- Ensure the redirect URI in Keycloak matches exactly with Passbolt
- Check that user emails match between Keycloak and Passbolt
TLS Trust Issues: If you see certificate verification errors:
- Verify the Keycloak server certificate is trusted by Passbolt
- Check that the certificate CN matches the Keycloak domain
- Ensure the root CA certificate is properly installed in Passbolt's certificate store
- Test with:
curl -v https://keycloak.local:8443(should show "SSL certificate verify ok")
Debug Mode
To enable SSO debug logging, set the environment variable:
export PASSBOLT_PLUGINS_SSO_DEBUG_ENABLED=true
This enables detailed SSO logging.
Important Notes
- Users must login with their passphrase after SSO activation for the SSO option to appear in future logins
- HTTPS is required for SSO to function properly
- Don't use the demo repository configuration in production - adapt all values for your environment