Configure Email authentication with Office 365
Introduction
This page is dedicated to providing you with valuable resources to help you configure an authentication method based on the email provider you choose. Authentication is an essential security measure that verifies the identity of users and ensures that only authorised individuals have access to sensitive information.
In order to follow this guide, you will need an email provider. If you want to know how to configure your email provider, please follow this link.
Office 365
Passbolt supports two authentication methods for Office 365:
- OAuth 2.0 (Client Credentials): recommended
- Uses short-lived access tokens issued by Microsoft Entra ID and avoids storing long-lived SMTP credentials.
- Basic authentication with an application password: legacy
- Being retired by Microsoft (see the deprecation notice in the legacy section).
OAuth 2.0 (Client Credentials)
This flow is designed for server-to-server email delivery, where no user interaction or refresh-token lifecycle is required. Passbolt requests an access token from Microsoft Entra ID at send time and uses it to authenticate to the SMTP server with XOAUTH2.
Before you start, you will need:
- A Microsoft 365 tenant where you can register applications in Microsoft Entra ID.
- A licensed Microsoft 365 mailbox to send from (or a shared mailbox the licensed account can send as).
- Access to Exchange Online PowerShell to register the application as a service principal.
Microsoft Entra ID configuration
- Register the application
Sign in to the Microsoft Entra admin center and register a new single-tenant application (e.g., passbolt SMTP). From the application overview, note the Directory (tenant) ID and the Application (client) ID; you will need them later in passbolt.
- Grant API permissions
Under API permissions, add the SMTP.SendAsApp permission of type Application (under Office 365 Exchange Online) and grant admin consent for your tenant.
- Create a client secret
Under Certificates & secrets, generate a new client secret and copy the Value immediately.
The secret value is only displayed once, right after creation. If you close the page without copying it, you will need to generate a new secret.
- Register the service principal in Exchange
In Exchange Online PowerShell, register the application as a service principal so it can send mail on behalf of the configured mailbox. Replace the placeholders with the values from your registered application and the target mailbox:
Connect-ExchangeOnline
New-ServicePrincipal -AppId <CLIENT_ID> -ServiceId <SERVICE_PRINCIPAL_OBJECT_ID> -DisplayName "Passbolt SMTP"
Add-MailboxPermission -Identity "[email protected]" -User <SERVICE_PRINCIPAL_OBJECT_ID> -AccessRights FullAccess
For the full procedure and the exact commands for your environment, refer to Microsoft's guide on authenticating an IMAP, POP or SMTP application by using OAuth.
Passbolt configuration
On your Passbolt instance, navigate to Administration > Email server.
- Select Office 365 as the email provider.
- Select OAuth (Client Credentials) as the authentication method.
- Fill in the SMTP server configuration fields:
| Field | Value |
|---|---|
| Directory (tenant) ID | The tenant ID from your Entra ID application |
| Application (client) ID | The client ID from your Entra ID application |
| Client secret | The secret value copied when it was created |
| Username | The full email address of the licensed Microsoft 365 mailbox used to send (e.g. [email protected]) |
The Username must match the licensed mailbox associated with the registered application and the service principal. A mismatch will cause authentication to fail when an email is sent.
- Fill in the Sender configuration fields:
| Field | Value |
|---|---|
| Sender name | Display name shown to recipients |
| Sender email | The username above, or the address of a shared mailbox the username has Send-As rights on |
Basic authentication with an application password (legacy)
Microsoft is retiring Basic Authentication for SMTP AUTH in Exchange Online:
- End of December 2026: Basic Authentication for SMTP AUTH will be disabled by default for existing tenants. Administrators will still be able to re-enable it temporarily if needed.
- New tenants created after December 2026: Basic Authentication for SMTP AUTH will be unavailable by default. OAuth will be the only supported authentication method.
- Second half of 2027: Microsoft will announce the final removal date.
We strongly recommend configuring OAuth 2.0 (Client Credentials) for new deployments. See Microsoft's deprecation announcement and updated timeline.
- Administration panel
When you are using Office 365, you will need to access your Microsoft 365 admin center.
- Create your SMTP credentials
You will need to set up an application password to authenticate with the SMTP server.
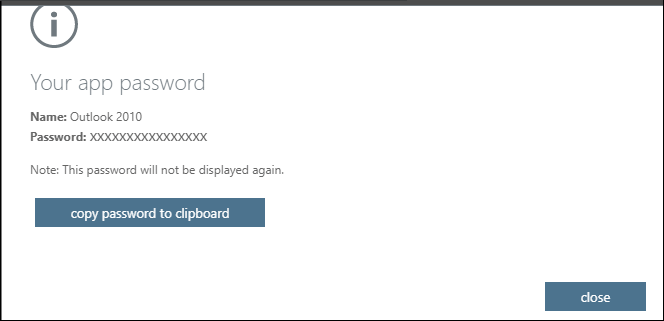
In the Microsoft 365 admin center, navigate to Additional security verification page > Add sign-in method > App password
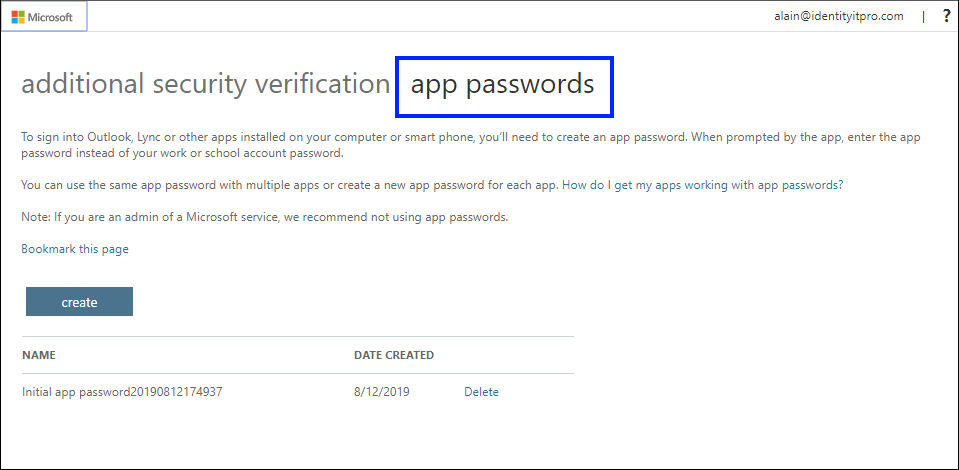
Please note that the password cannot be shown after you close the tab. Be sure to copy the generated application password (otherwise you will need to generate a new one).
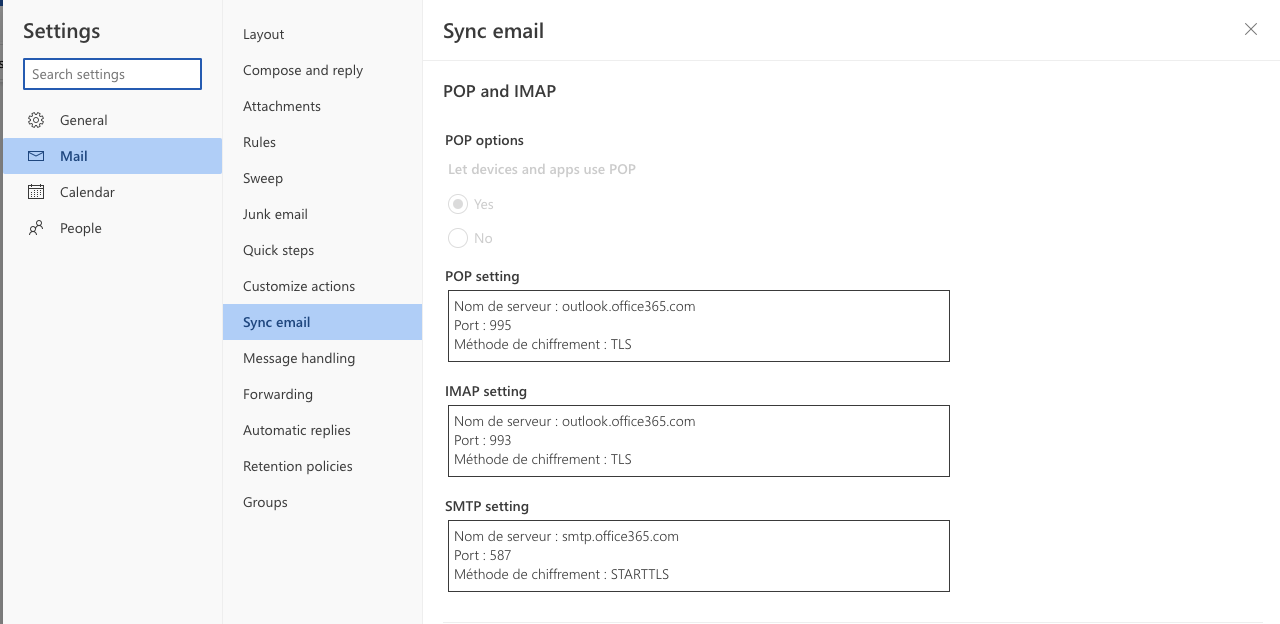
Now, you'll need to get the SMTP settings that are available from Outlook in Settings > Mail > POP and IMAP
- Authentication on passbolt GUI
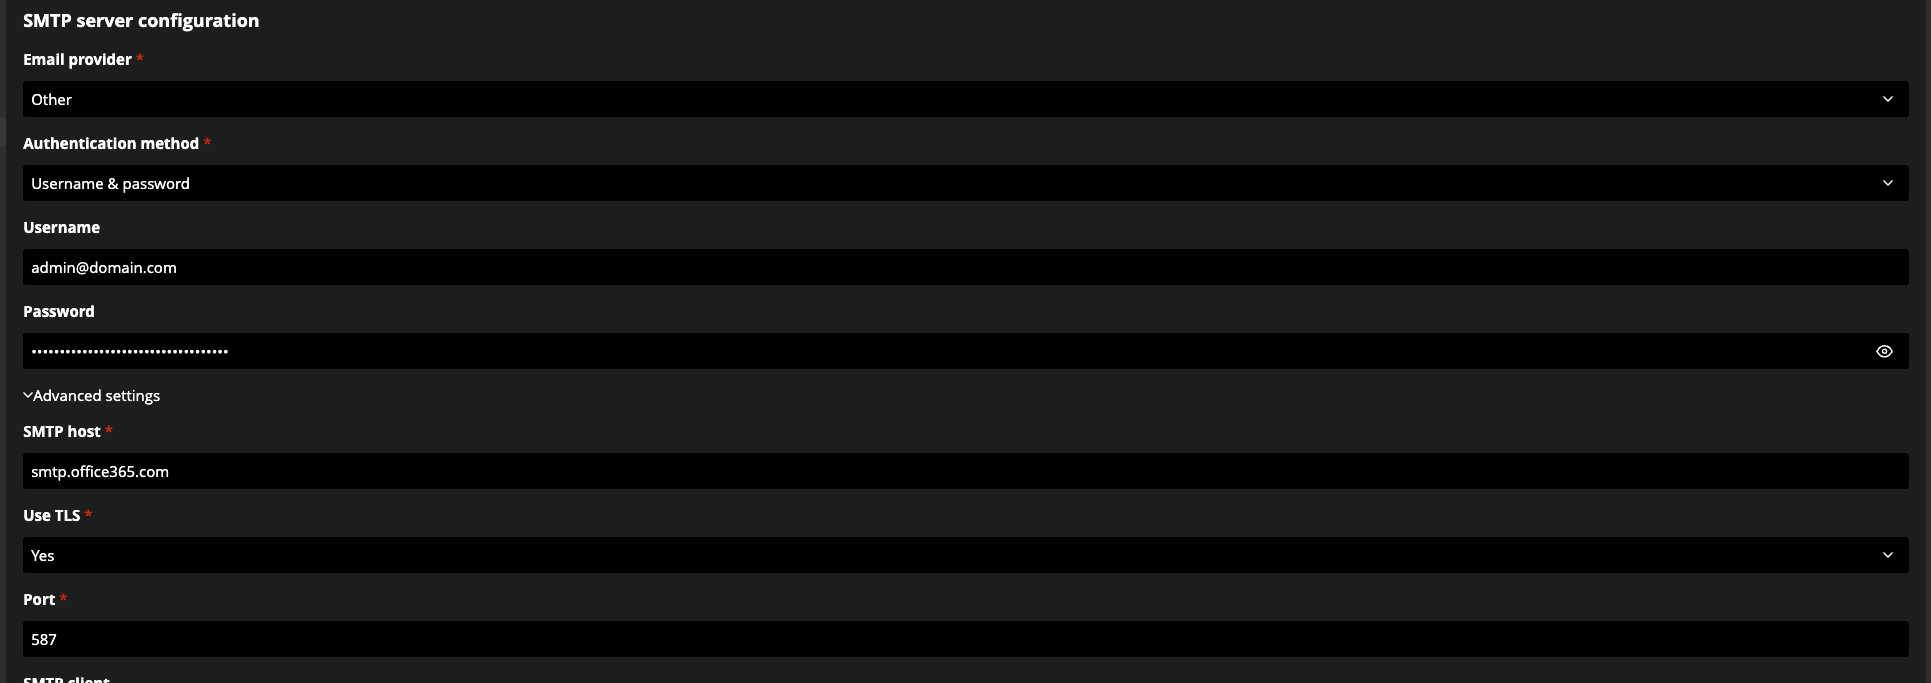
On your Passbolt instance, navigate to Administration > Email server.
Fill in your SMTP credentials to match your authentication method. Use the application password (not your login credentials).
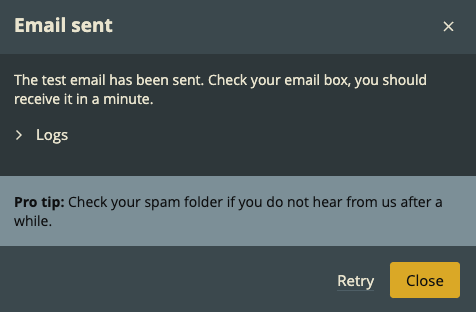
- Test your configuration
Before saving your configuration, you will need to test it in order to avoid any issues. it should pass and give the results shown below.
- Save your configuration
If everything went as expected, do not forget to save your configuration and "Success: The SMTP settings have been saved successfully" should appear.