How to manage users
This page covers managing user accounts by hand: creating and inviting users, resending invitations, editing user details, changing roles, and suspending users. To remove users permanently, see how to delete users. To provision users automatically, see users directory, SCIM or self-registration.
How to create a user
Only users with the administrator role can create users. To create a user:
- Log in as an administrator and select ⚙ > Manage Users & Groups in the top right corner
- Click the Create button and select User
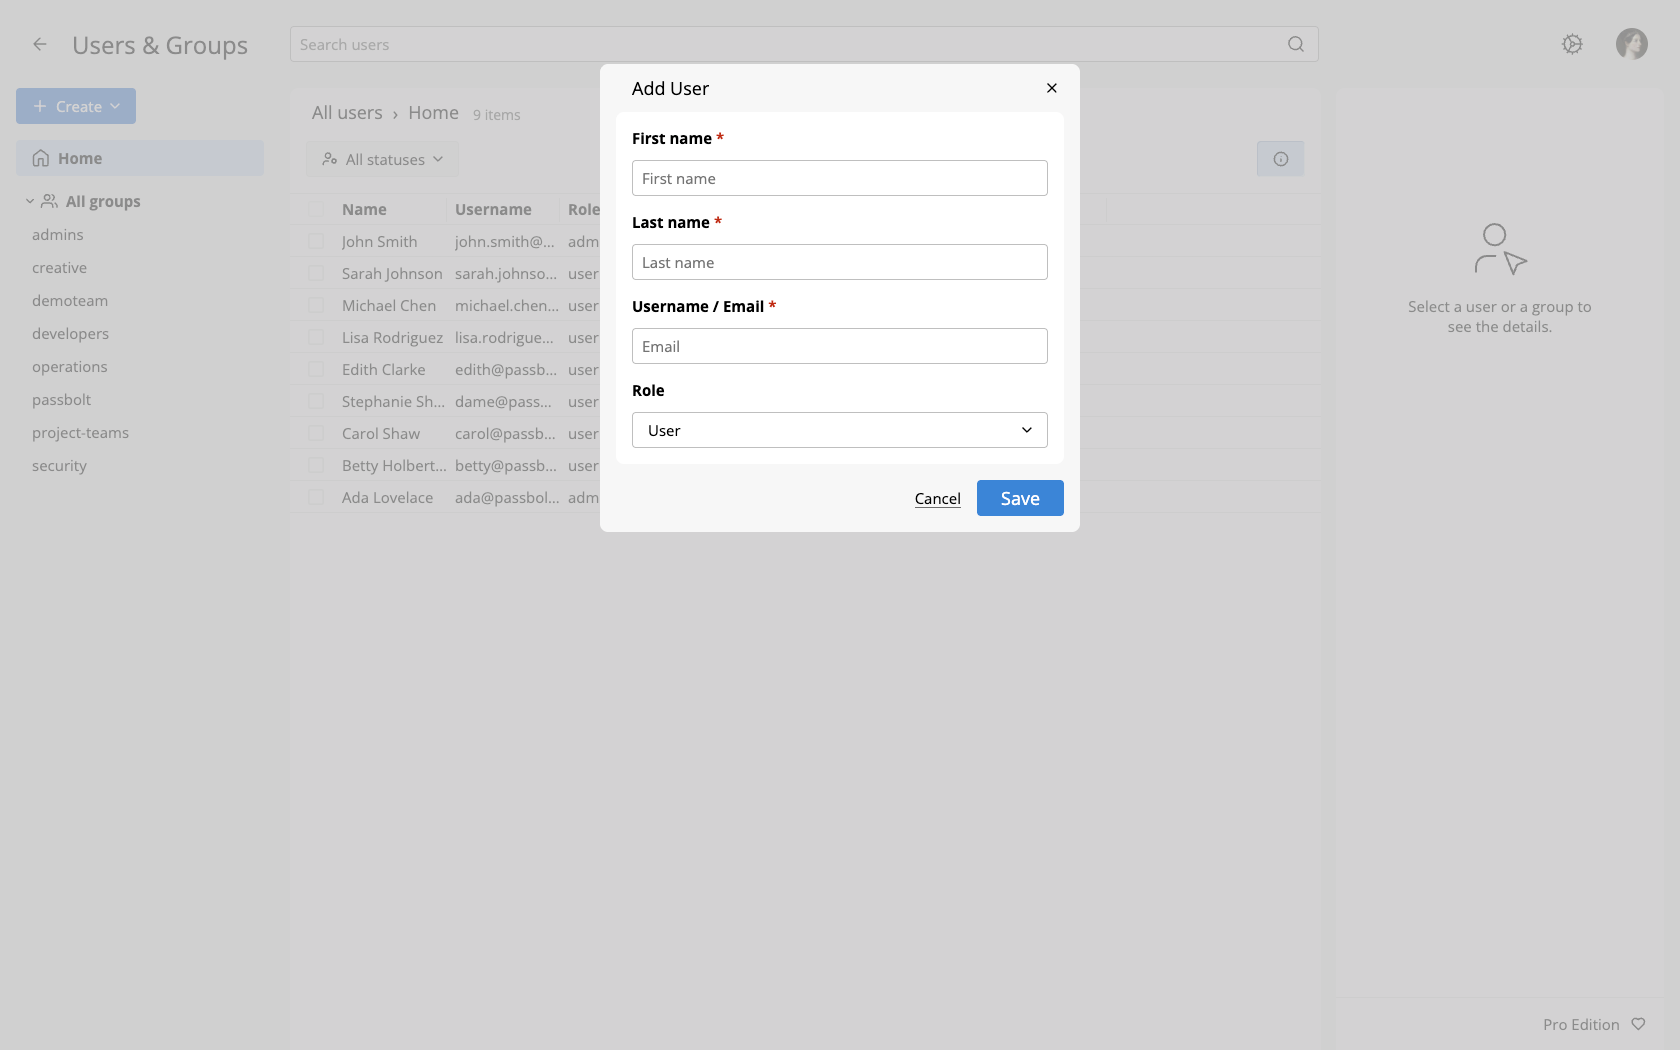
- In the Add User dialog, fill in the First name, Last name and Username / Email fields
- Select the Role. It defaults to User, select Admin to create an administrator
- Click Save
The new user receives a welcome email with a get started link. Following the link walks them through the account setup: installing the browser extension, generating their key and choosing a passphrase. The account stays inactive until they complete this setup.
The invitation link is valid for 10 days by default. On self-hosted instances this can be
changed with the PASSBOLT_AUTH_REGISTER_TOKEN_EXPIRY variable, see the
environment reference. If the link has expired, resend
the invitation as described below.
On Passbolt Pro Edition and Cloud, a user only counts towards your subscription seats once they complete their setup. See how to update the subscription key.
How to resend an invitation
If a user did not receive the invitation email or their link has expired, you can send them a fresh one:
- Log in as an administrator and select ⚙ > Manage Users & Groups in the top right corner
- Select the user, then click Resend invite in the toolbar. The same action is available by right-clicking the user and choosing Resend invite from the contextual menu
This sends a new invitation email with a new link. The option is only available while the user has not completed their setup, which the user details panel shows as Activation pending; it is greyed out for active users.
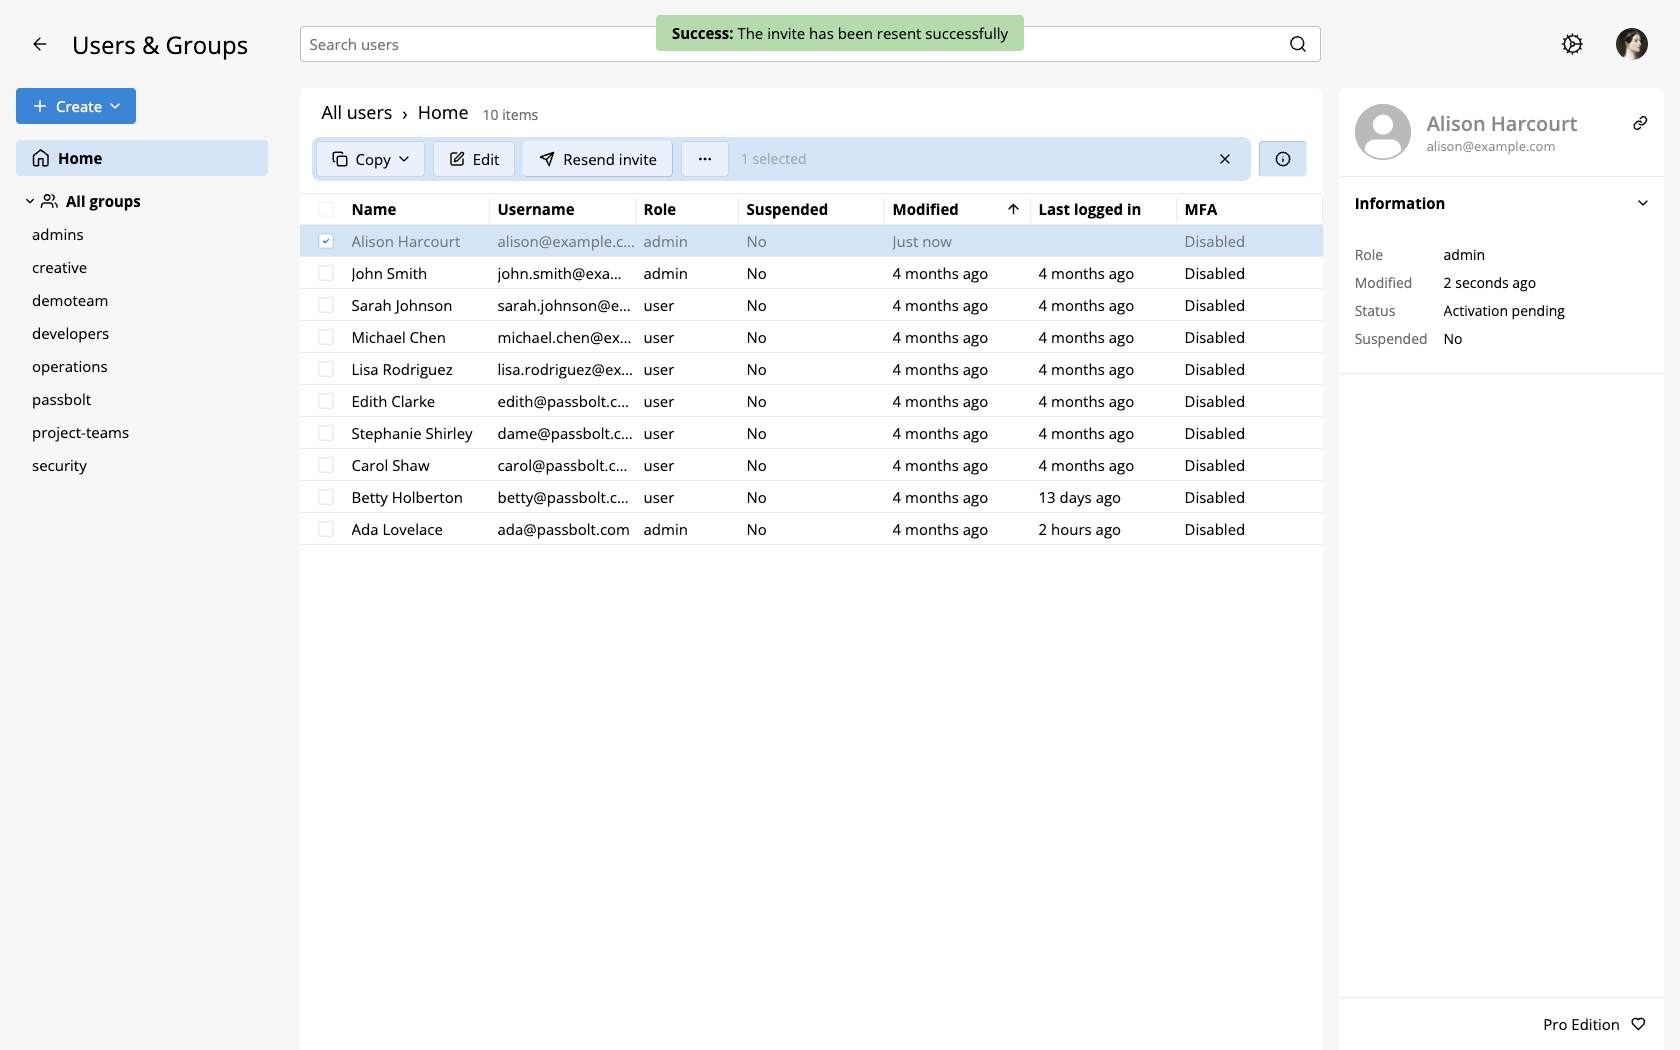
The invitation goes into the email queue and is delivered in the background. passbolt confirms success as soon as the email is queued, not when it is delivered, and the interface gives no indication if delivery later fails. So if the user received nothing the first time, resending returns the same confirmation and will not fix it.
Troubleshoot delivery instead: list the queue with the show_queued_emails command to see the
error, then work through email delivery issues. Also check
that When new users are invited to passbolt, notify them is enabled in the email
notification settings. While it is off, no invitation is queued at all and the confirmation
still appears.
How to edit a user
Administrators can change the first name and last name of any user:
- Log in as an administrator and select ⚙ > Manage Users & Groups in the top right corner
- Right-click on the user and select Edit, or select the user and click Edit in the toolbar
- In the Edit User dialog, update the First name or Last name
- Click Save
The username (email address) of an existing user is read-only, in the interface and in the API. It identifies the account and cannot be edited after creation.
How to change a user's role
The role is changed from the same Edit User dialog, using the Role dropdown. Select Admin to promote a user to administrator, or User to demote an administrator. The change takes effect immediately, the user does not need to sign in again.
You cannot change your own role: the Role dropdown is disabled when you edit your own account, so promoting or demoting an administrator always requires another administrator.
See roles and permissions for what each role can do.
How to suspend a user
Suspending a user blocks their access without deleting anything, for example while someone is on extended leave or while you investigate an incident. To suspend a user:
- Log in as an administrator and select ⚙ > Manage Users & Groups in the top right corner
- Right-click on the user and select Edit
- In the Edit User dialog, turn on the Suspend this user toggle
- Click Save
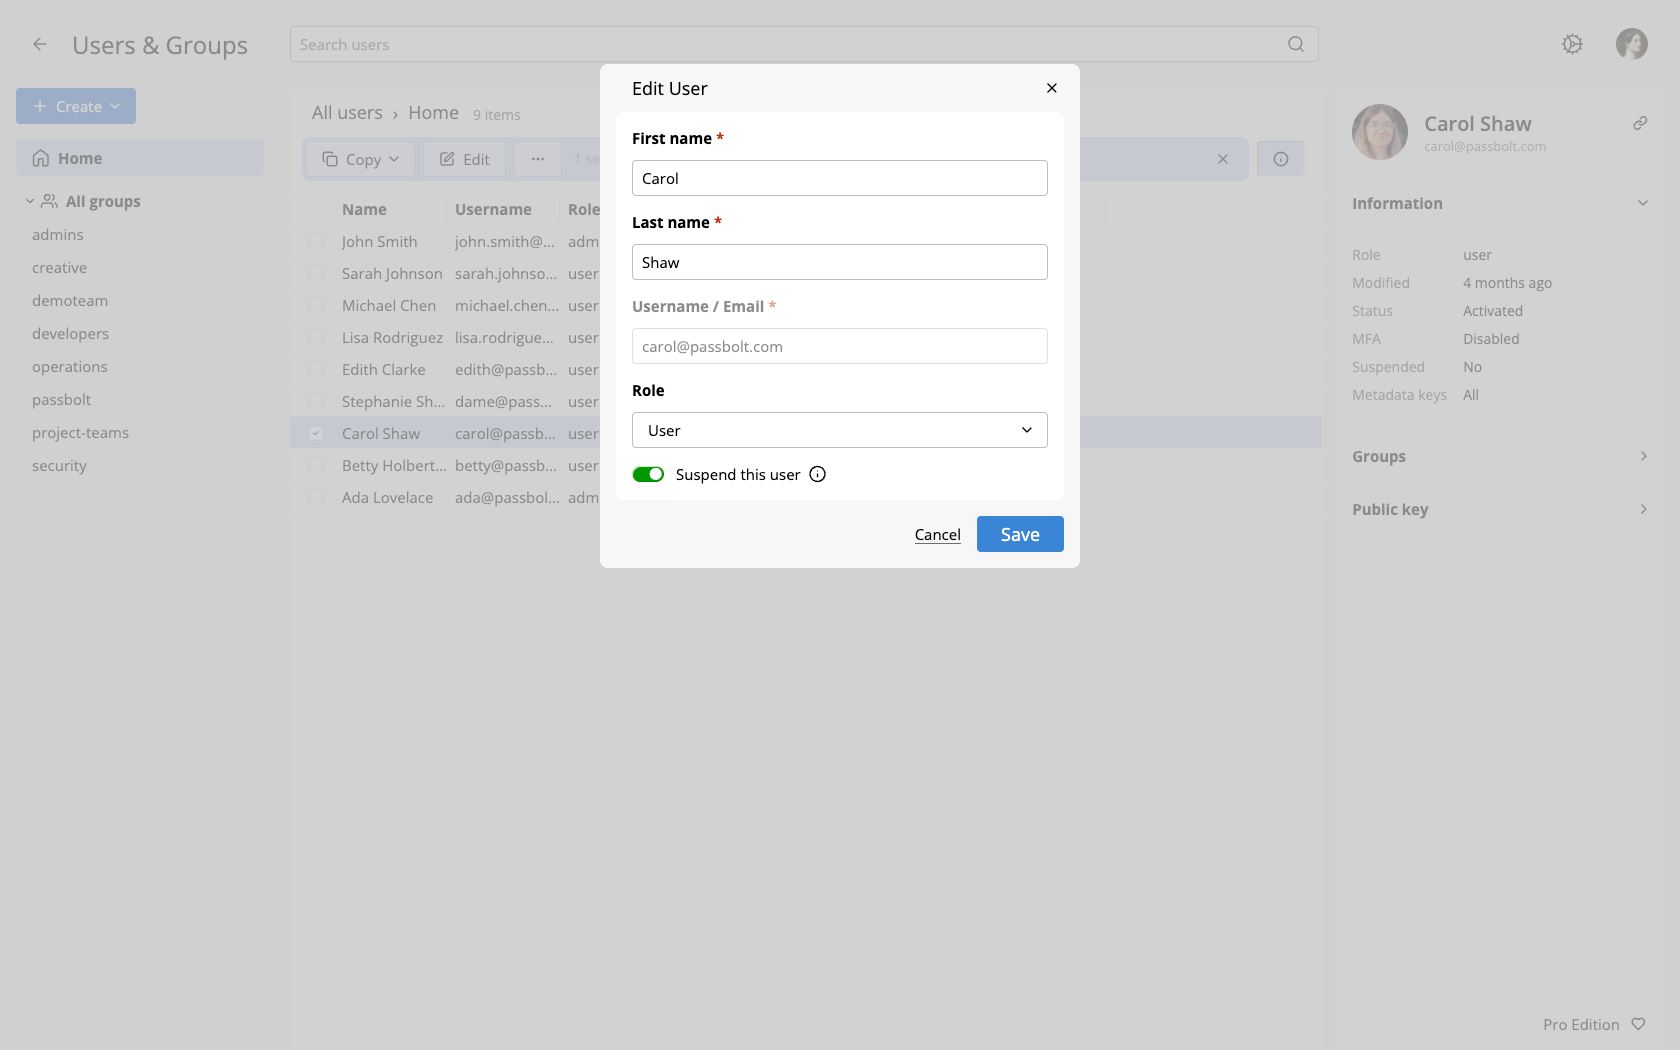
When a user is suspended:
- They can no longer sign in, with any authentication method.
- Their existing sessions stop working on their next request.
- Their group memberships, shared passwords and permissions are untouched.
- On Passbolt Pro Edition and Cloud, they still count towards your subscription seats. See suspend or delete below.
If automatic password expiry is enabled, the passwords the suspended user had accessed are marked as expired, so their owners are prompted to rotate them. See password expiry.
To reinstate the user, open the same dialog, turn off the Suspend this user toggle and save. They can sign in again immediately.
Users can also be suspended automatically: users directory can be configured to suspend users removed from the directory instead of deleting them, and deactivating a user through SCIM suspends them.
Suspend or delete?
| Suspend | Delete | |
|---|---|---|
| Sign-in blocked | Yes | Yes |
| Reversible | Yes | No |
| Personal passwords | Kept | Deleted |
| Group memberships and shares | Kept | Removed or transferred |
| Subscription seat (Pro and Cloud) | Still used | Freed |
Suspension is the right tool for a temporary absence, an investigation, or keeping a departed user's account on hold until their passwords are handed over. Deletion is permanent: the user's personal passwords are destroyed and ownership of shared items may need to be transferred, see how to delete users.
Note that suspending a user does not free a subscription seat, only deleting the user does.