Configure Email authentication with Microsoft Exchange Server
Introduction
This page is dedicated to providing you with valuable resources to help you configure an authentication method based on the email provider you choose. Authentication is an essential security measure that verifies the identity of users and ensures that only authorised individuals have access to sensitive information.
In order to follow this guide, you will need an email provider. If you want to know how to configure your email provider, please follow this link.
Microsoft Exchange Server (on-premises)
This page covers on-premises Microsoft Exchange Server. If your mailboxes are in Exchange Online / Microsoft 365, follow the Office 365 page instead.
Exchange side
passbolt submits emails to Exchange the same way a mail client does: authenticated SMTP client submission, by default on port 587 with STARTTLS. Exchange only offers authentication once the connection is encrypted, so a connection test without STARTTLS will not show an authentication option.
Check the following with your Exchange administrator:
- A receive connector accepts authenticated client submissions on port 587 (Exchange creates one by default, named Client Frontend <ServerName>), and the account used by passbolt is allowed to submit through it.
- The account has a mailbox, and may send as the address you plan to use as the sender email.
- The TLS certificate served on port 587 is trusted by the passbolt server. If Exchange serves a certificate from an internal CA, either add that CA to the passbolt server's trust store or configure the custom certificate options.
passbolt configuration
On your passbolt instance, select ⚙ > Organisation settings > Email server in the top right corner.
- Select Other as the email provider.
- Select Username & Password as the authentication method.
- Fill in the fields:
| Field | Value |
|---|---|
| Username | The account's user principal name, e.g. [email protected]. If authentication fails, try the DOMAIN\username form: which one Exchange accepts depends on its configuration. |
| Password | The account's password |
| SMTP host | Your Exchange server hostname, e.g. mail.yourdomain.com (under Advanced settings) |
| Use TLS | Yes (under Advanced settings) |
| Port | 587 (under Advanced settings) |
| Sender email | An address the account may send as |
Setting it as configuration instead
The same settings can be supplied as configuration rather than entered in the interface. Select your installation method:
- Package Installation
- Docker
Open /etc/passbolt/passbolt.php and edit the EmailTransport and Email blocks:
[...]
'EmailTransport' => [
  'default' => [
      'host' => 'mail.yourdomain.com',
      'port' => 587,
      'username' => '[email protected]',
      'password' => 'your-password',
      'tls' => true,
  ],
],
'Email' => [
  'default' => [
      'from' => [
          '[email protected]' => 'Passbolt'
      ],
  ],
],
[...]
Save and quit.
On Docker the same settings are provided as environment variables in your docker compose file:
services:
passbolt:
environment:
EMAIL_TRANSPORT_DEFAULT_HOST: "mail.yourdomain.com"
EMAIL_TRANSPORT_DEFAULT_PORT: 587
EMAIL_TRANSPORT_DEFAULT_TLS: "true"
EMAIL_TRANSPORT_DEFAULT_PASSWORD: "your-password"
docker compose treats $ in a value as the start of a variable interpolation, silently mangling passwords that contain it: write every $ as $$. Keep the value double-quoted so YAML does not reinterpret other characters, and if the password contains double quotes, escape them as \". A password that works everywhere else but fails only on Docker is a sign the compose file altered it: compare with docker compose config, which prints the interpolated result.
- Test your configuration
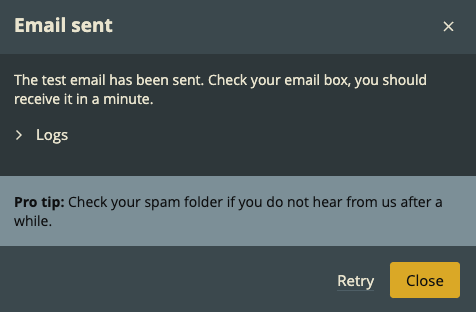
Before saving your configuration, you will need to test it in order to avoid any issues. it should pass and give the results shown below.
- Save your configuration
If everything went as expected, do not forget to save your configuration and "Success: The SMTP settings have been saved successfully" should appear.
If the test email succeeds but the queued notification emails fail, or authentication errors persist, see the email troubleshooting page.