Hello, Passbolt community! Exciting news: we've listened to your requests and are thrilled to announce that our Helm Chart now supports PostgreSQL. This enhancement not only broadens our database support but also aligns perfectly with our mission of providing open and elegant solutions for modern security needs.
Why PostgreSQL?
PostgreSQL is renowned for its robustness and reliability, making it a popular choice for database management. Integrating PostgreSQL support into our Helm Chart offers more flexibility and choice. This aligns with our core value of putting security first, as PostgreSQL is known for its strong security features.
How Does It Work?
The integration relies on the Bitnami PostgreSQL chart. We've added it as a conditional dependency in our Helm Chart, allowing you to fully configure your PostgreSQL deployment directly from the Passbolt Helm Chart values.
Installation Options
By default, the Passbolt Helm chart continues to use MariaDB. However, if you prefer PostgreSQL, you can easily configure the Helm values to make this switch. Passbolt Helm chart is ready to be installed adding a new postgresql deployment managed by the chart itself and also installing just passbolt that is connected to an existing postgresql server.
Installation tutorial
Pre-Requisites
Before diving in, ensure you have the following:
Helm installed.
Access to a Kubernetes cluster where you can deploy Passbolt.
In this file, we're enabling PostgreSQL (postgresqlDependencyEnabled: true) and disabling MariaDB (mariadbDependencyEnabled: false). Customize the username, password, and database fields as per your requirements.
Step 2: Installing Passbolt with PostgreSQL
With your values.yaml file ready, you can now install Passbolt using Helm. Run the following command:
This command deploys Passbolt on your Kubernetes cluster, using PostgreSQL as the database.
Step 3: Verifying the Installation
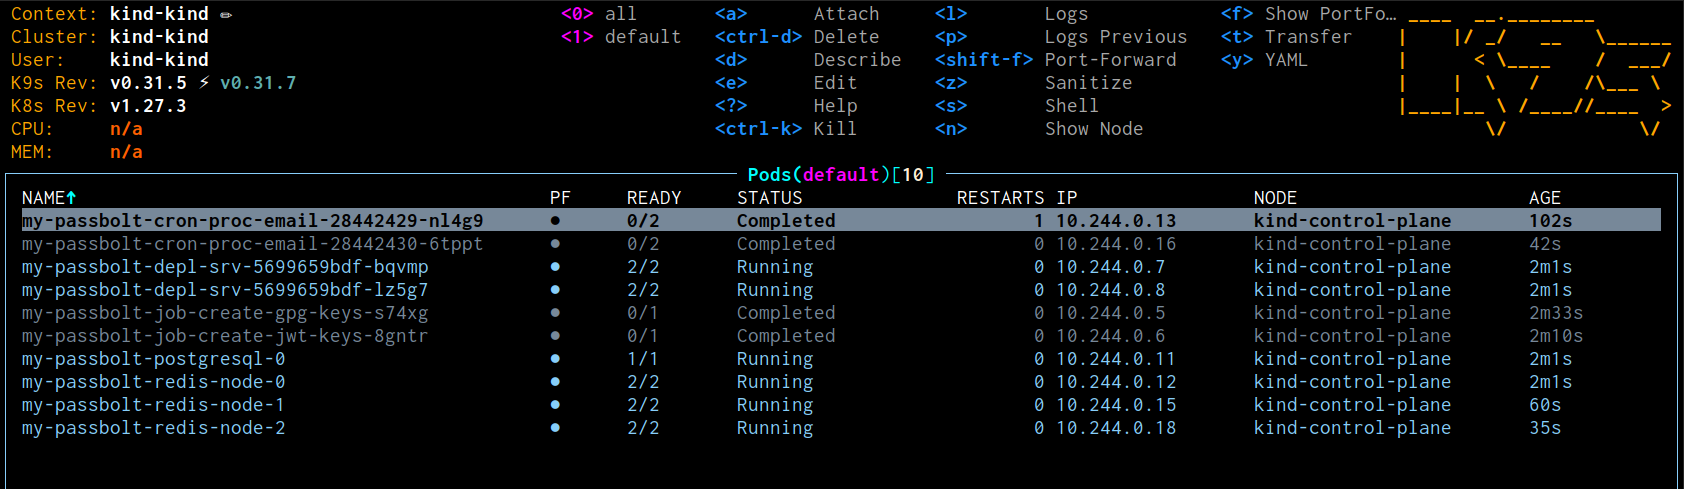
To ensure everything is set up correctly, you can check the status of your pods:
kubectl get pods
Look for your Passbolt pod and PostgreSQL pod to be in a Running state.
Passbolt containers running with postgresql database
Install passbolt with an existing Postgresql server
If you're using an existing PostgreSQL server, update the values.yaml to reflect that:
# values.yaml for existing PostgreSQL
postgresqlDependencyEnabled: false
mariadbDependencyEnabled: false

app:
  database:
    kind: postgresql

passboltEnv:
  plain:
    DATASOURCES_DEFAULT_HOST: <POSTGRESQL_SERVER_ADDRESS>
    DATASOURCES_DEFAULT_PORT: <POSTGRESQL_SERVER_ADDRESS_PORT> (if it is not 5432)
  secret:
    DATASOURCES_DEFAULT_DATABASE: <DATABASE>
    DATASOURCES_DEFAULT_USERNAME: <POSTGRESQL_SERVER_USER>
    DATASOURCES_DEFAULT_PASSWORD: <POSTGRESQL_SERVER_PASSWORD>
    DATASOURCES_DEFAULT_SCHEMA: <POSTGRESQL_PASSBOLT_SCHEMA> (optional)
Then, deploy using the same Helm install command.
That's it! You've successfully installed Passbolt with PostgreSQL support. This enhancement is all about providing you with the flexibility to align Passbolt with your existing infrastructure, reinforcing our commitment to security, collaboration, and community-driven development.
Enhanced Collaboration
This update is not just about technical improvements; it's about enhancing collaboration within teams. By offering PostgreSQL support, we're enabling teams that rely on this database system to integrate Passbolt more seamlessly into their existing infrastructure. This step reflects our belief in inclusivity and our goal of making Passbolt the most widely used password manager among technical teams.
Let's Keep the Conversation Going
We’re keen to hear how you leverage this new PostgreSQL support in your Passbolt experience. Join the conversation on our community forums, and let's keep building this together. After all, we're in this together, and your input is invaluable in shaping Passbolt's future.
Thank you for being a part of our journey towards a more secure, collaborative digital world.