4 min. read
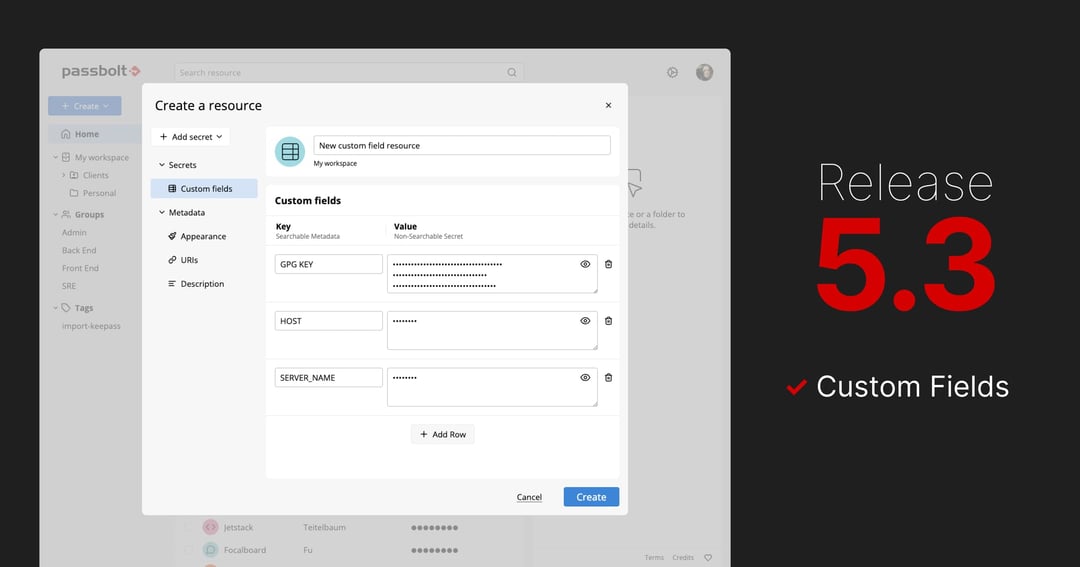
Passbolt 5.3 Introduces Custom Fields and Performance Improvements
Passbolt 5.3 introduces custom fields, allowing structured key-value data alongside credentials and includes performance enhancements.

Passbolt v5 introduces a full redesign together with major changes to the security model. At the heart of these changes is encrypted metadata, the foundation on which the new resource types and capabilities (such as multiple urls, icons, custom fields, secure notes, etc.) are built.
With the release of v5.5.0, encrypted metadata is now stable and enabled for all users. It is no longer experimental and is supported across both self-hosted and Cloud instances.
If you are running a self-hosted instance installed after v5.4 (August 12th) or a Cloud instance created after v5.5 (September 18th), encrypted metadata is already enabled and you can ignore this guide; otherwise, it is for you.
Important: Like any major upgrade, we recommend testing the new resource types first. These initial tests should only be conducted in a non-production environment to prevent potential issues.
While this new architecture has passed a full Cure53 security audit (see report) and has been battle-tested over the past months, it remains a major upgrade. As with any significant change, we recommend understanding the risks and limitations before enabling it.
To help you decide whether the feature set is ready for your environment, here are the current limitations as of v5.5:
Even after these items shipped, some gaps will remain that you may want to evaluate before enabling the feature:
If you haven’t yet configured your organization’s metadata encryption preference, you can enable it quickly using the simplified getting started wizard with just one click. If your setup is already configured, no problem, we’ll guide you through the process step by step.
Important: Like any major upgrade, we recommend testing the new resource types first. These initial tests should only be conducted in a non-production environment to prevent potential issues.
If you haven’t yet configured your organization’s metadata encryption preference, you will find a Getting started option under the Resource types menu in your organization settings.
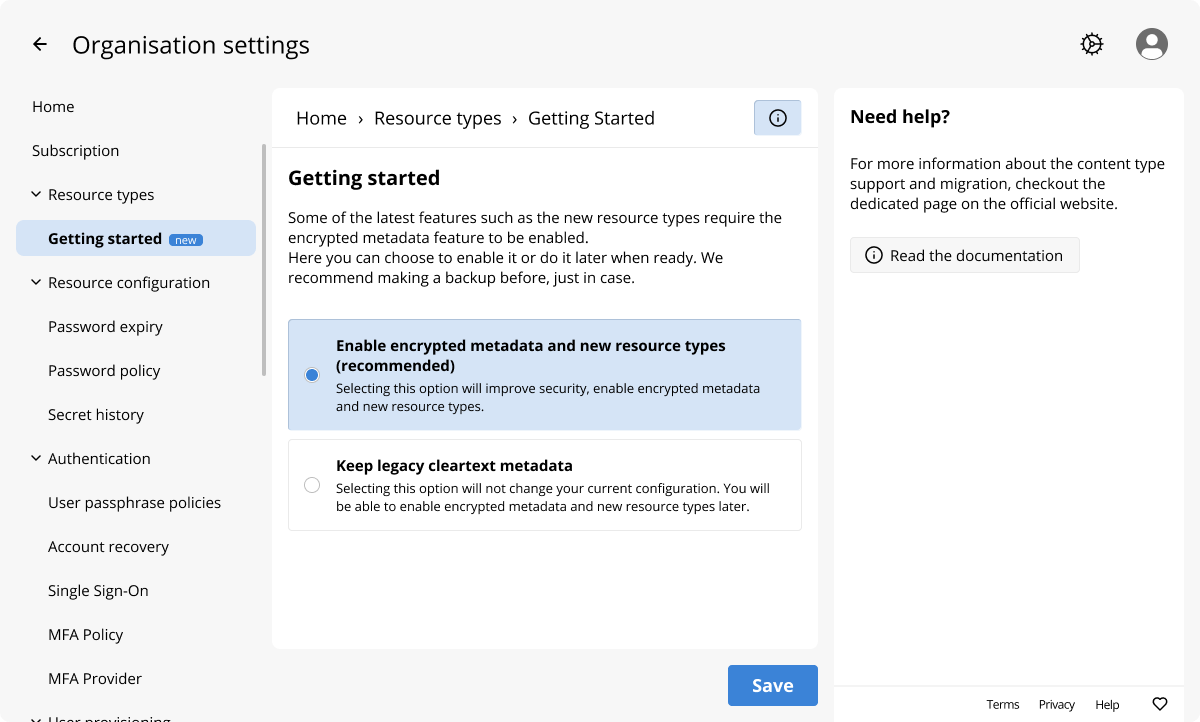
To enable the capability you can:
That’s it, encrypted metadata is now enabled for your instance. Keep in mind that existing content is not automatically migrated, only new content will use this capability. When you’re ready to migrate your existing content, refer to the Migrate existing content section
If your organization’s metadata settings were previously configured, you will have access to more fine-grained options and can enable the feature from there. This section walks you through the process. For a detailed explanation of each option, please refer to the administrator documentation.
Encrypted metadata requires an organization-wide shared metadata key, and this key must be created manually by an administrator.

Important: If for some reasons this step fails, this may be because you have some issues with some users' keys. It is best to resolve these problems before moving on to the next steps. The healthcheck and datachecks commands should provide some pointers on why this is not working for your setup. Of course, you can ask for help on the community forum or [email protected] if you are a paying customer, we’ll help you sort any issue out.
Encrypted metadata is one of the key structural changes in v5 resource types. It must be enabled and set as the default format to take full advantage of the new capabilities.
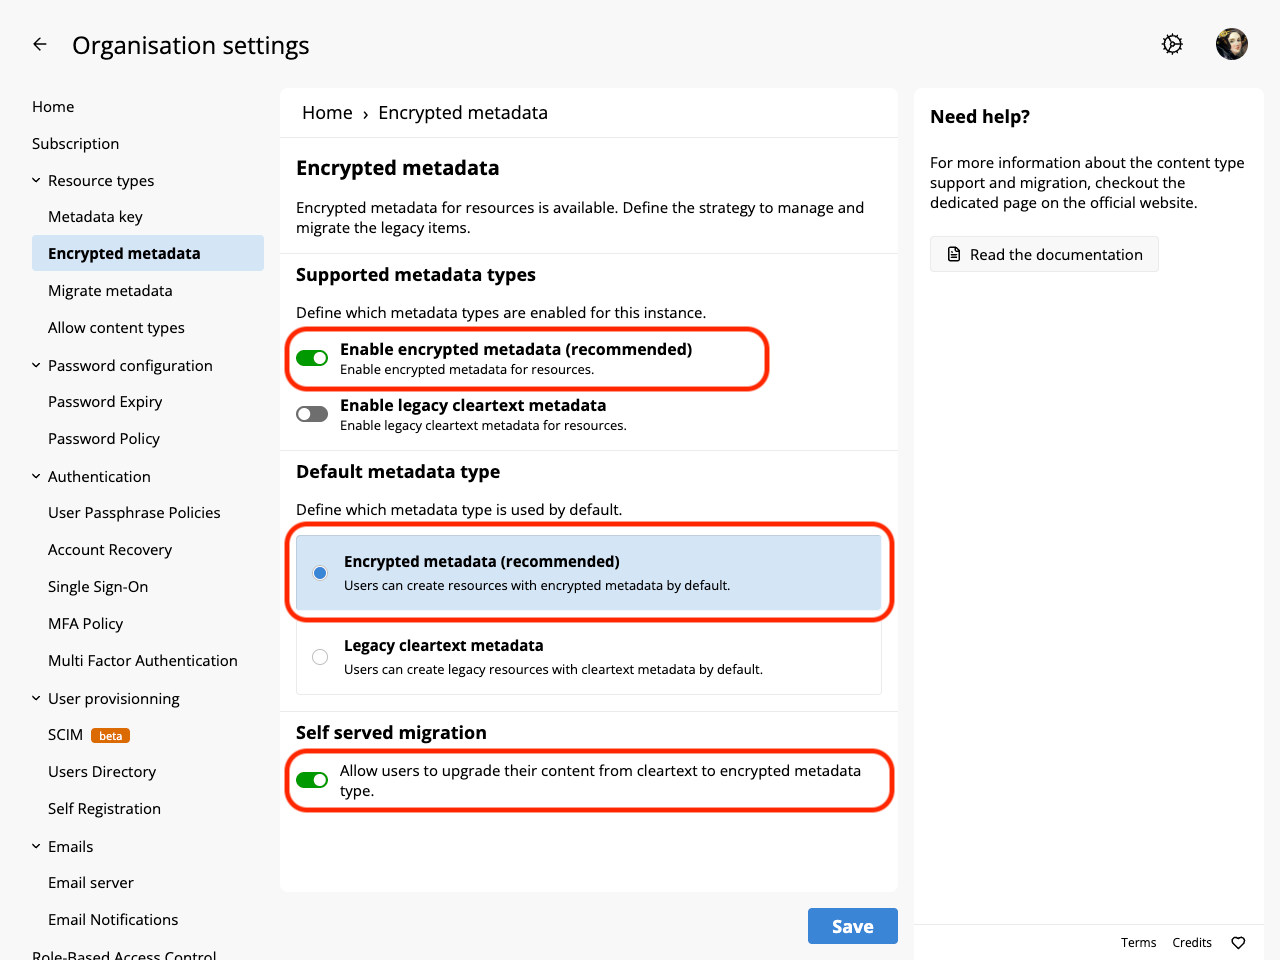
Navigate to Administration > Resource types > Encrypted metadata.
That’s it, encrypted metadata is now enabled for your instance. Keep in mind that existing content is not automatically migrated, only new content will use this capability. When you’re ready to migrate your existing content, refer to the Migrate existing content section
Important: If you have any custom integrations that rely on metadata such as resource names or URLs, they may stop working if you migrate to the new format. In these cases, it’s recommended to first create new v5-format secrets and update your integrations to point to them.
Encrypted metadata is now active, so every new item already benefits from icons, multiple URIs, and custom fields. The next step is to bring the same capabilities to the existing resources you created before the switch. This is the most delicate phase of the rollout. Make a verified backup of your instance before you begin; if anything goes wrong, a backup is your only safety net.
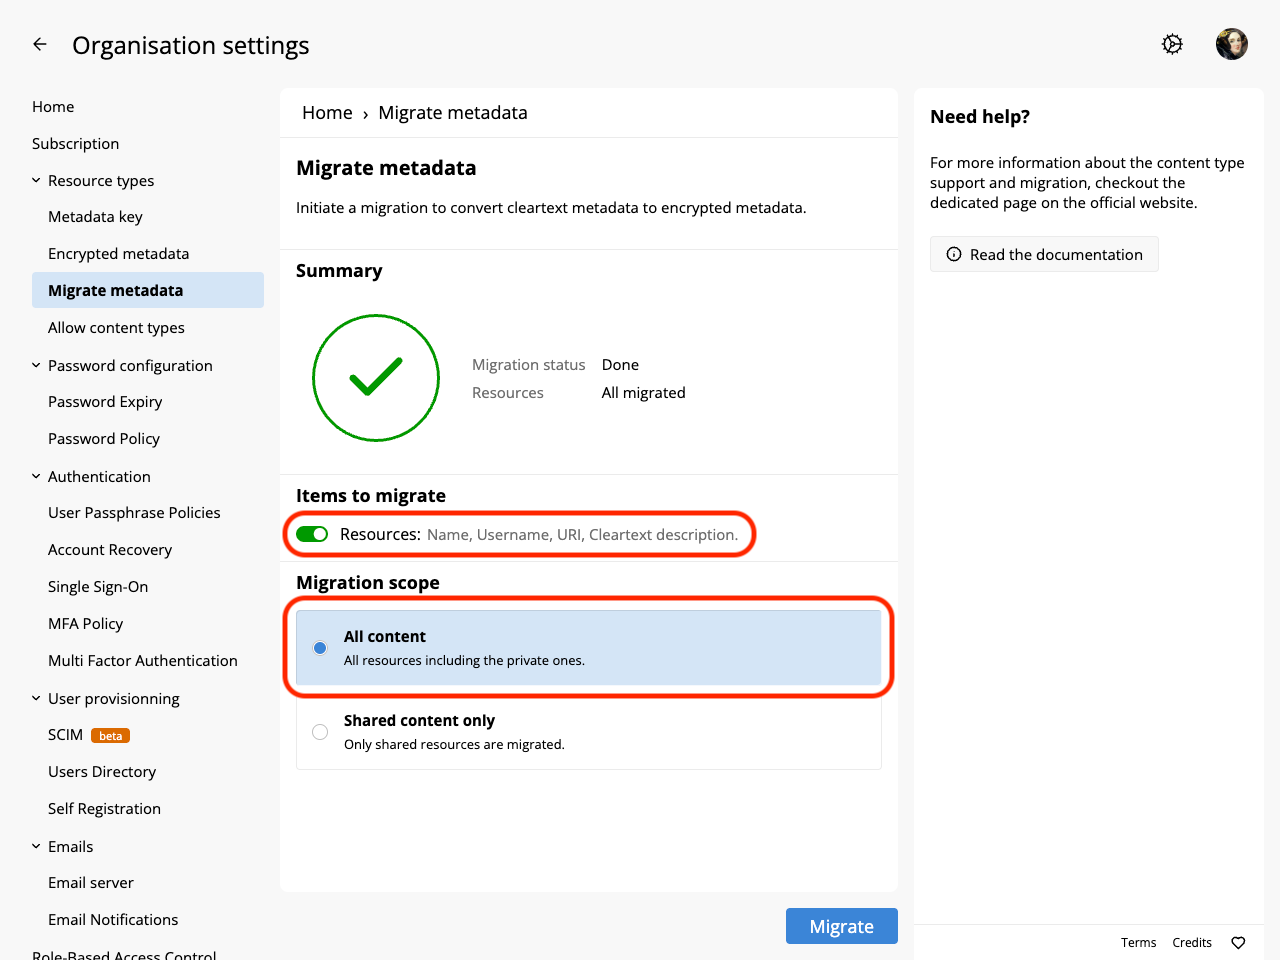
Once your integrations are migrated and you are ready, here the final migration procedure follows.
Thank you for taking the time to try these new features. They have been a long-running effort, and your experience matters to us. If you encounter any issues or have suggestions, please post on the community forum, the team is eager to hear your feedback.
Last update: September 18, 2025
4 min. read
Passbolt 5.3 introduces custom fields, allowing structured key-value data alongside credentials and includes performance enhancements.

3 min. read
Get your Passbolt dev environment running quickly with DDEV—automatic HTTPS, built-in Xdebug, Mailpit, and Adminer included.