Configure Email authentication with Google
Introduction
This page is dedicated to providing you with valuable resources to help you configure an authentication method based on the email provider you choose. Authentication is an essential security measure that verifies the identity of users and ensures that only authorized individuals have access to sensitive information.
In order to follow this guide, you will need an email provider. If you want to know how to configure your email provider, please follow this link.
Google
Passbolt provides two different options for Google: Google Workspace and Google Email.
Google Workspace is a paid productivity suite that includes business email, cloud storage, video conferencing, and other collaboration tools. It is designed for use by businesses and organizations of all sizes, and provides additional features such as custom email addresses, shared calendars, and team drives.
It uses smtp-relay.gmail.com as its SMTP server address. This server is intended to be used by applications that send email on behalf of users, such as custom scripts or third-party applications. This server is designed to provide higher sending limits, enhanced reliability, and better tracking of email sent through it.
Google Email is a free email service that is available to anyone with a Google account. It is primarily intended for personal use and provides users with a simple, user-friendly email interface.
It uses smtp.gmail.com as its SMTP server address. This server is intended for use by individual users who want to send email using a desktop email client, such as Microsoft Outlook or Apple Mail. This server provides standard sending limits and is intended for personal use.
To use Google's authentication method on the Passbolt GUI, it is important to note that you should not use your personal Google password for security reasons. Instead, you will need to create an "App password" specifically for Passbolt. This is a unique password that will be used solely for Passbolt and is not the same as your personal Google password.
- Enable MFA
In order to have a dedicated application password you will need to enable MFA on your Google account, if you already have MFA enabled you can skip to the second part.
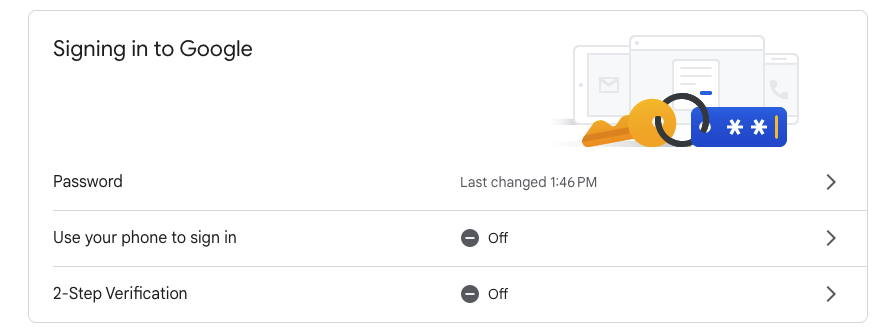
You will have to navigate from Manage your Google Account > Security > Signing in to Google
After clicking on 2-Step-Verification you should be redirected to a "Get Started" page as shown below
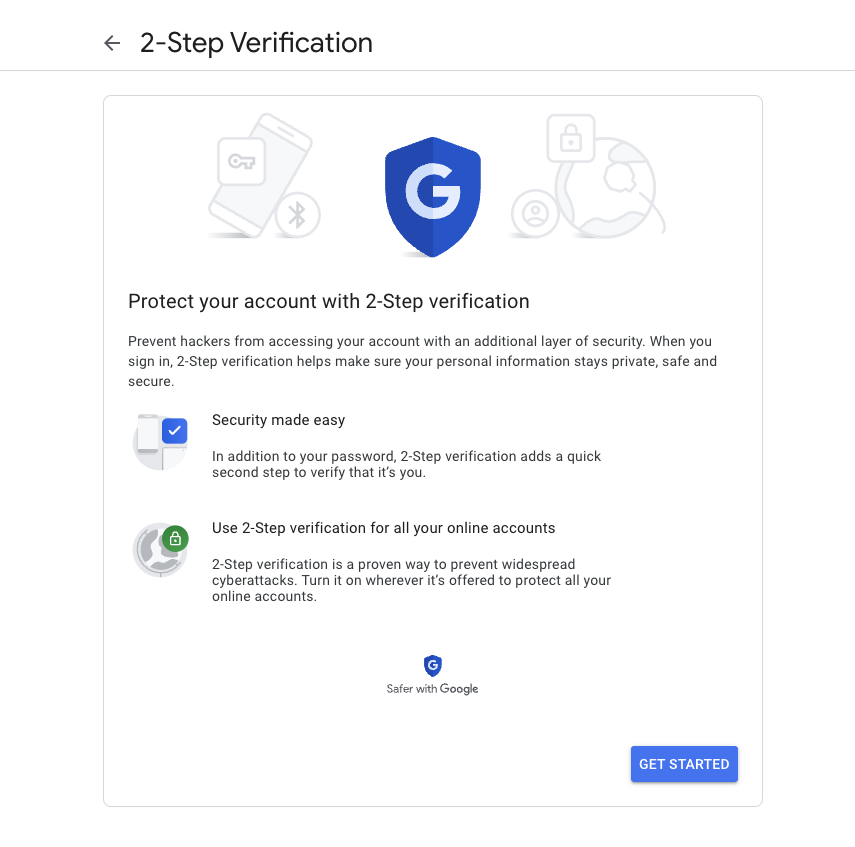
To configure MFA on Google you will need a TOTP Mobile Application.
- Enable Application Password
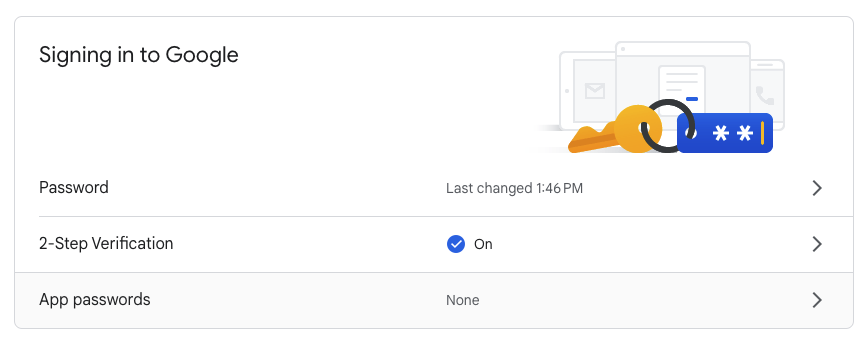
Now that MFA is enabled on your Google account, please go back to Security > Signing in to Google
You will have the choice for the selection of the application, our recommendation is to use Other (Custom name), as it will be easier for your organisation. In our case, we will name it "Passbolt".
An application password should have been generated, it contains 16 digits and should not be shared.

Please, note that the password could not be shown after your close the tab, please be sure to copy the application password generated otherwise you will need to generate a new one.
- Authentication on Passbolt GUI
On your Passbolt instance, you can navigate to Administration > Email server.
You are using Google Workspace? You will need to add the IP address of the passbolt instance in the "SMTP client" field.
In the example below, we will use Google Email which is the free version.
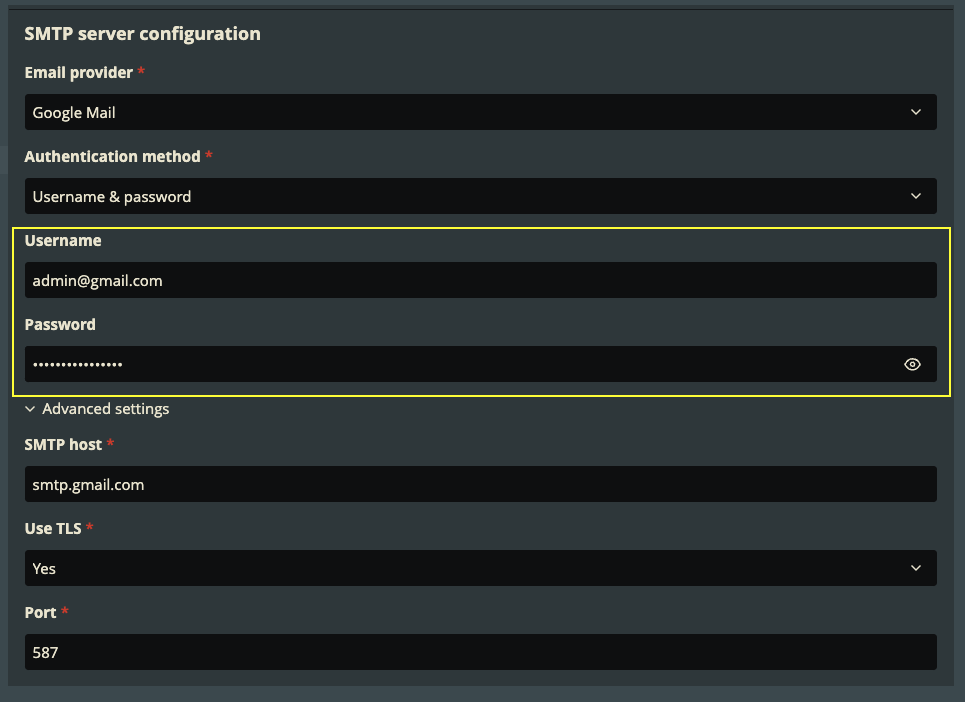
Under authentication method, choose Username & password, provide your Google username which basically is your email address, for the password you can paste the previously generated application password.
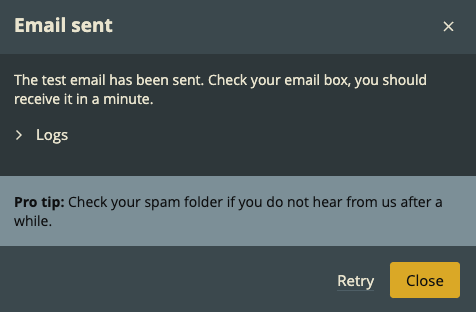
- Test your configuration
Before saving your configuration, you will need to test it in order to avoid any issues. it should pass and give the results shown below.
- Save your configuration
If everything went as expected, do not forget to save your configuration and "Success: The SMTP settings have been saved successfully" should appear.